


Barcode scanners offer a quick and efficient way to capture data and streamline business operations. By integrating barcode scanners with Microsoft Excel, businesses can enhance data entry processes, improve accuracy, and save valuable time. In this article, we will guide you through the process of setting up barcode scanners with Excel, enabling seamless data capture and organization.

Step 1: Identify a Compatible Barcode Scanner
Ensure you have a barcode scanner that is compatible with your computer and supports USB or Bluetooth connectivity. Most barcode scanners function as keyboard wedges, meaning they mimic keyboard input when scanning a barcode.
Step 2: Prepare Excel Spreadsheet
Open Microsoft Excel and create a new spreadsheet or open an existing one. Determine the specific column(s) where you want the scanned barcode data to be entered. It is recommended to have a dedicated column for barcode entries to maintain data organization.

Step 3: Enable Data Entry
In Excel, go to the selected cell or column where you want the barcode data to be entered. Ensure the cursor is in the correct position to receive the scanned data.
Step 4: Configure Barcode Scanner
Connect the barcode scanner to your computer using the appropriate interface (USB or Bluetooth). Most barcode scanners do not require any additional software installation. However, refer to the manufacturer’s instructions for any specific configuration steps.
Step 5: Test the Barcode Scanner
Open a text editor or a simple application like Notepad. Scan a barcode using the scanner. The scanned data should appear in the text editor as if it were manually typed.
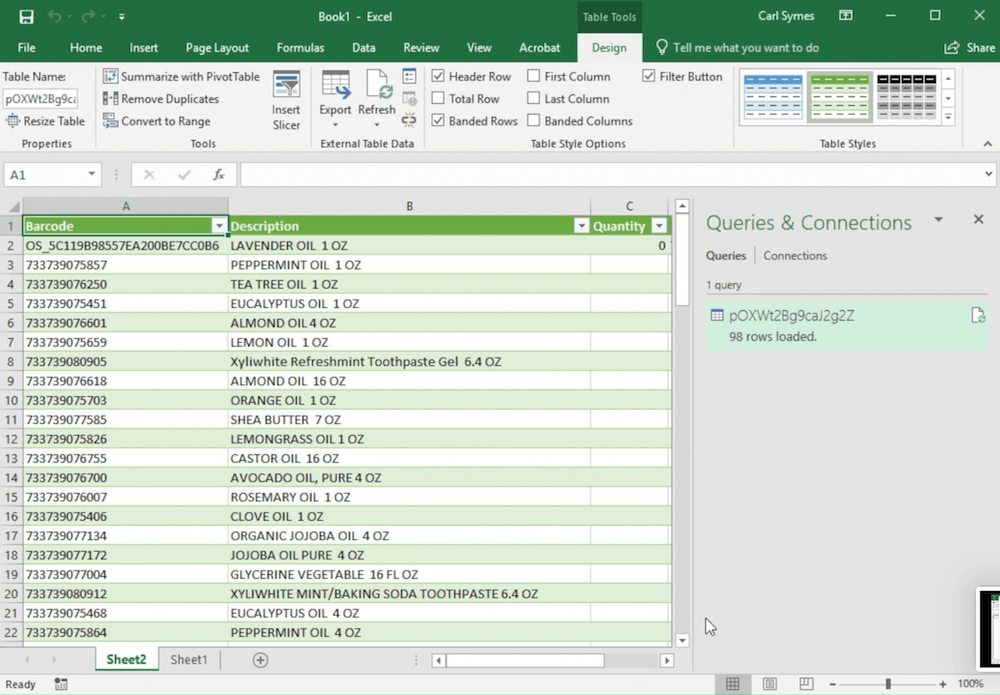
Step 6: Scan Barcodes into Excel
Switch to the Excel spreadsheet. Begin scanning barcodes using the barcode scanner. The scanned data will be entered directly into the selected cell or column in Excel. Repeat this process for each barcode you need to enter.
Step 7: Format Data as Needed
Once the data is scanned into Excel, you can apply formatting options such as adjusting font styles, cell borders, or applying conditional formatting rules. This step will help make the data more readable and visually appealing.
Step 8: Validate and Analyze Data
Utilize Excel’s built-in data validation tools to ensure the accuracy and consistency of the scanned data. You can also leverage Excel’s data analysis features to generate reports, perform calculations, and gain valuable insights from the captured barcode data.
Setting up barcode scanners with Excel can significantly enhance data entry processes, improve accuracy, and save time for businesses. By following the steps outlined above, you can seamlessly integrate barcode scanning capabilities into your Excel spreadsheets. This integration empowers businesses to streamline operations, maintain accurate inventory records, and harness the power of data analysis to make informed decisions. Embrace the power of barcode scanners and Excel to unlock new levels of efficiency and productivity in your business.
Frequently Asked Questions
Can any barcode scanner work with Excel?
Most barcode scanners that function as keyboard-input devices can work with Excel. The scanner usually enters the barcode value into the selected cell as if it were typed manually.
Do I need special software to scan barcodes into Excel?
In many cases, no special software is required. Most barcode scanners can connect via USB or Bluetooth and send scanned data directly into Excel.
Why is my barcode scanner not entering data into the correct Excel cell?
This usually happens when the wrong cell is selected before scanning or when scanner settings are not configured properly. Make sure the cursor is in the intended cell before scanning.
Can I use a wireless barcode scanner with Excel?
Yes, a wireless or Bluetooth barcode scanner can work with Excel as long as it is properly paired with the computer and configured correctly.
How do I scan multiple barcodes into different rows in Excel?
Many barcode scanners can be configured to add an automatic line break or tab after each scan. This allows each scanned barcode to move to the next row or column in Excel.
For businesses looking beyond spreadsheet-based barcode tracking, our RFID Tags: The Complete Guide to Radio Frequency Identification Technology is a useful next step in evaluating broader inventory visibility solutions.
If you are still deciding which scanner type is best for your workflow, our 1D vs 2D Barcode Scanner Guide can help you understand the differences between scanner types and choose the right option for your business needs.
